How to set up the Shop into the tour?

Andrea
Last Update 2 months ago
You can easily create Shop in your virtual tour by adding Snipcart integration to your Tour or using your Woocommerce site if you already have one.
Select Virtual Tours -> List Tours from the side menu and click the Edit button on the desired tour.

Go to tab Shop.

In this menu you can see the steps required to add a Shop to your tour, you can choose between two Shop Type of integration.
SNIPCART
Create the Snipcart account and configure it by following the steps described.
After you’re done you can add your Public Key and select Currency from dropdown picker.
Click the + icon located in the top right corner of the screen.
In the window that appears, enter a name and the price of the product.
Click the + Create button to confirm.


Now you will be taken to the Product editing page, where you can change these settings:
- Name: Enter the title of the product as it should appear in the viewer (e.g., "SVARTHÖ Cushion").
- Price & Currency: Set the numerical cost and the currency code (e.g., EUR, USD) for the item.
- Purchase Type: Choose the action for the primary button:
- None
- Cart: Adds the item to an internal shopping cart system within the tour.
- Link: Redirects the user to an external URL (like your Shopify or WooCommerce store).
- Popup: open the URL in a modal window
- Button Icon: Select a relevant icon (like a shopping cart or bag).
Button Text: Customize the call-to-action text (e.g., "ADD TO CART").
Button Background & Color: Use the color pickers to match the button styling to your brand's palette.
- Description: Use the text editor to provide detailed information, specifications, or formatting for the product.
- Media Upload: Drag and drop or click to upload multiple high-resolution photos of the product.
- Gallery Order: Once uploaded, you can drag the images to change their order. The first image in the list will typically serve as the primary thumbnail for the product.

When you're done click the Save button at the top of the page.
WOOCOMMERCE
You need to install CoCart plugin into your Wordpress installation.
Enter the url address into Store Url, and the API Customer Key and Secret of your Woocommerce Store.

To view the product of your Store, select Virtual Tours -> Products from side menu.

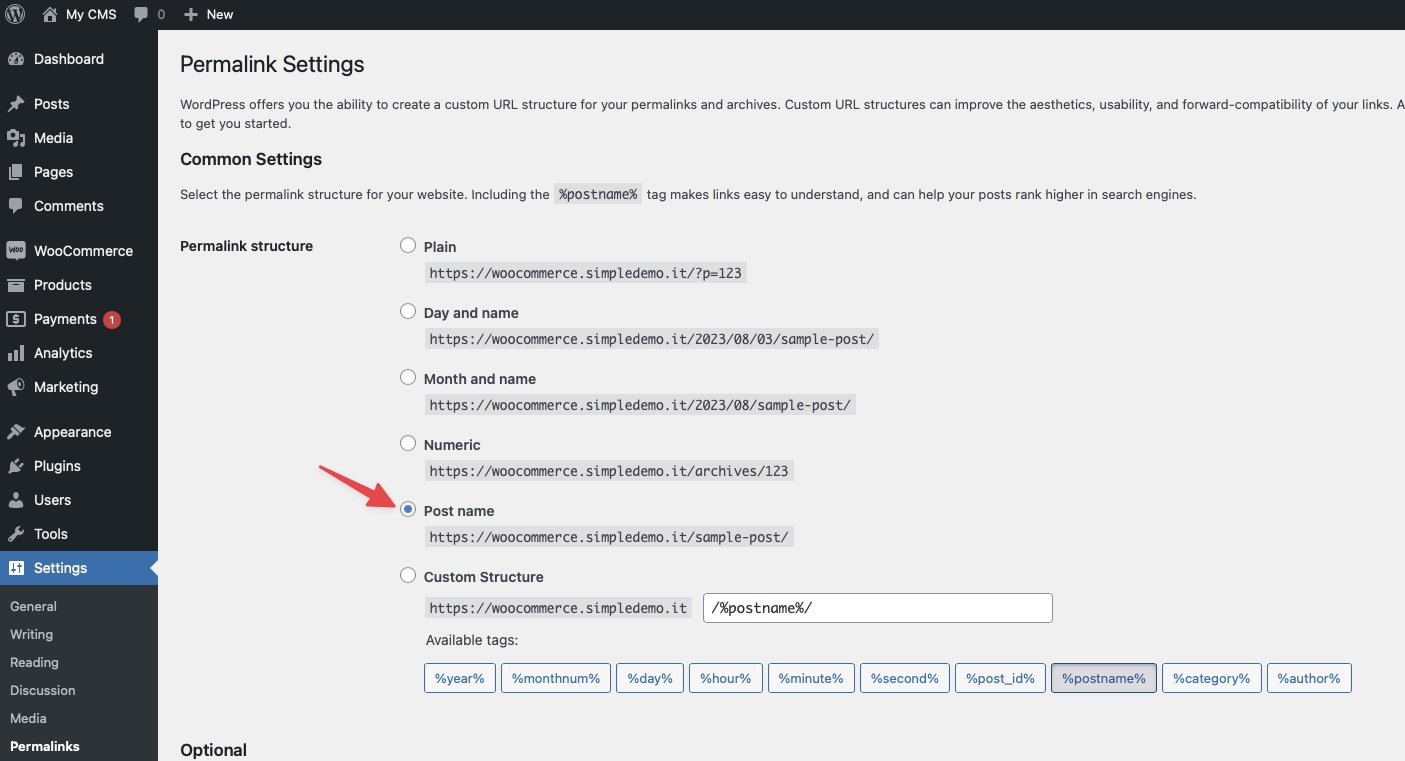
N.B. If you get a JSON syntax error, go to your Wordpress administration panel -> Settings -> Permalinks.
Set Permalink Structure as Post name.
ADD PRODUCTS INTO THE TOUR
Now you need to create a POI and link it to the desired product.
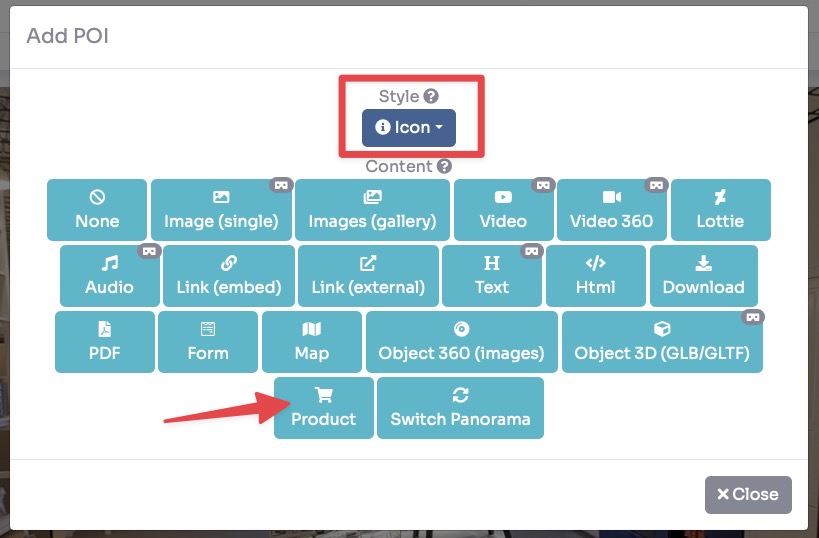
Select Virtual Tours -> POIs from side menu.
Select room you want to add Product to and click the button "+" on top right.
Select Style of the POI and click "Product" button into Content.
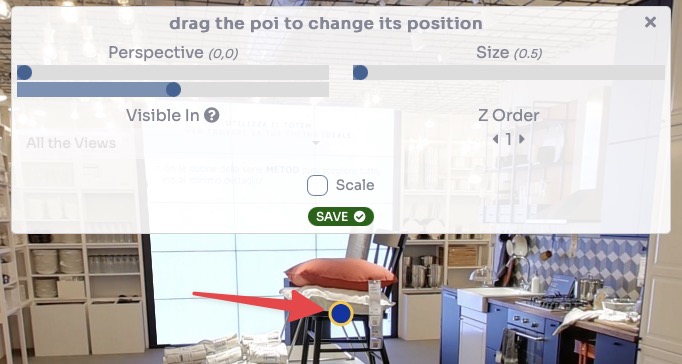
Drag the POI's icon to change location of Product and then click Save.
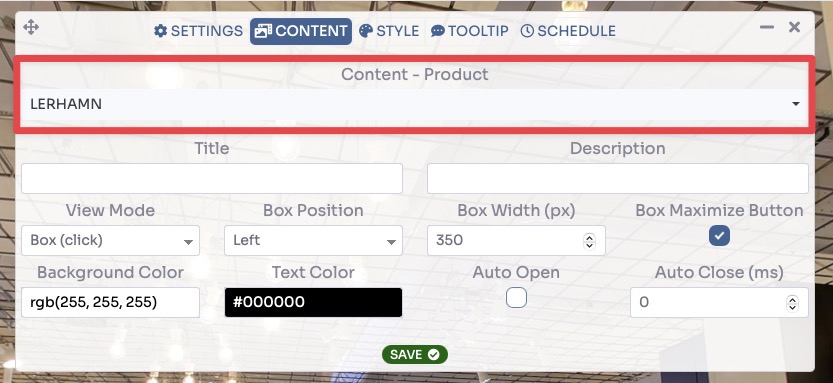
As a last thing you need to select the product in the Content - Product field to assign to the POI and click Save.
Now your product is ready to be sold and this is the end result:
