How to create Virtual Staging (Before / After)?

Andrea
Last Update 2 months ago
Select Virtual Tours -> Rooms from the side menu and click the Edit button on the desired room.

Go to tab Multiple Room Views.
Select from the following display modes:
- Single View: Displays one panorama at a time, allowing users to switch between versions via a menu or button.
- Split View with Slider: Displays two versions of the room simultaneously with an interactive vertical slider, allowing users to compare them side-by-side.
- Live Panorama View: Automatically blends or transitions between different panoramas to create a "living" environment effect.
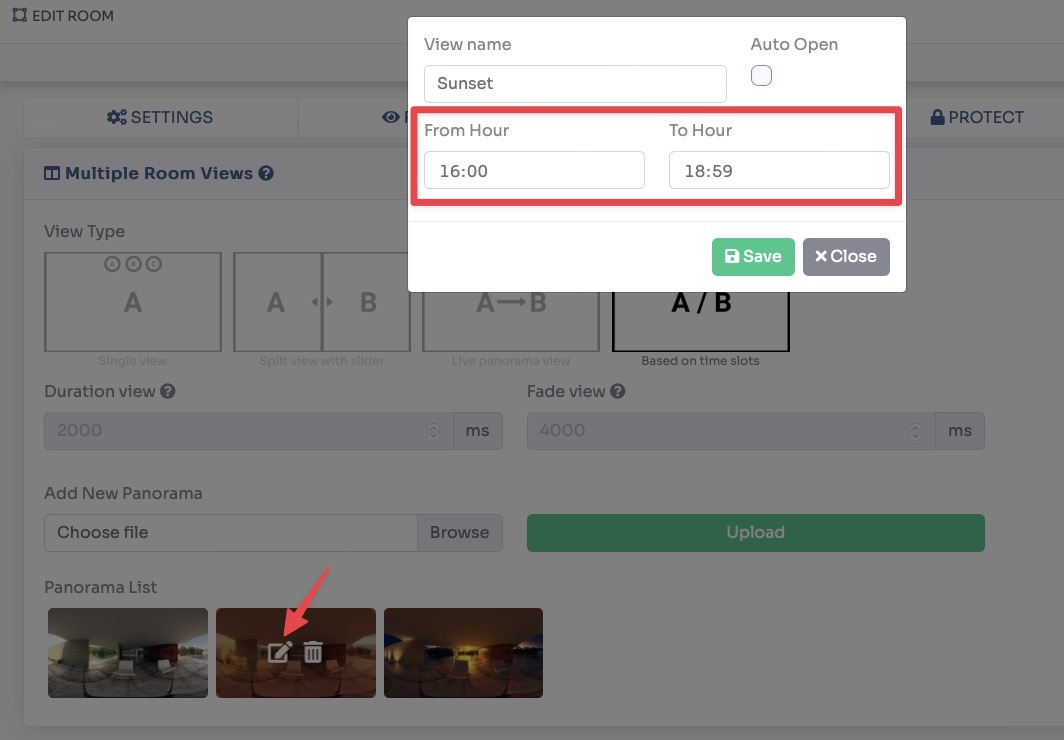
- Based on Time Slots: Automatically switches the displayed panorama based on the current time of day or a predefined schedule.

Single View
You can load different versions of the same room and switch between them by clicking on the buttons that will appear at the top of the tour below the room name.
Split view with slider
You can select the different versions of the room as in the single view, but in this mode the window will be divided into 2 showing a before and after effect.

You can view a live preview of this mode into this demo
Live Panorama View
In this mode you can load different versions of the same room that will automatically change from one to the other based on the time defined in the duration view and fade view fields.
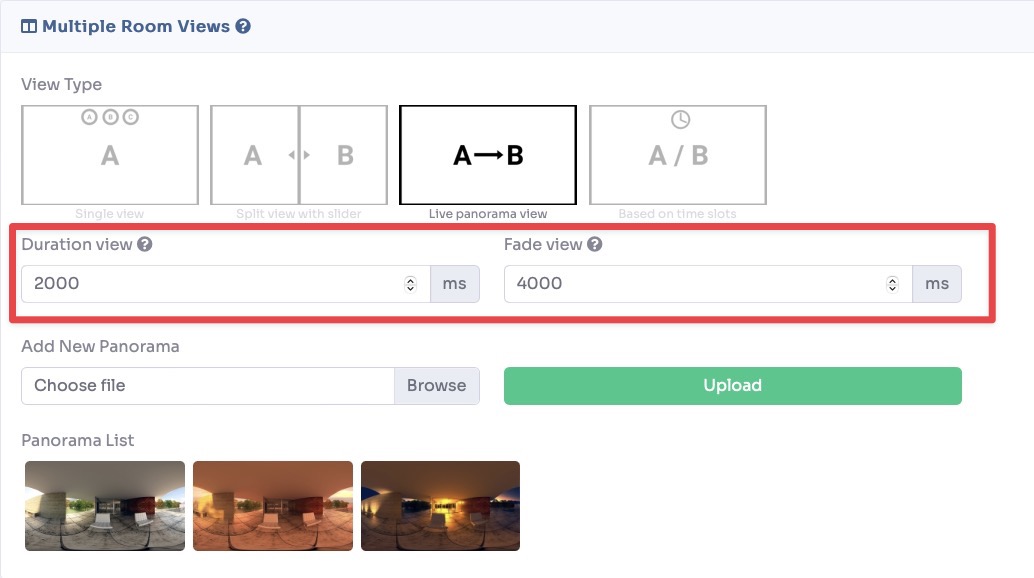
You can view a live preview of this mode into this demo
Based on time slots
The operation is similar to the live panorama, but in this case the various versions of the room will change according to the time defined in each of them.