
How to add contents (POIs) into a Room?

Andrea
Last Update 5 mesi fa
Select Virtual Tours -> POIs from the side menu.
Select room you want to add the POI to and click the button "+" on top right.

When the pop-up opens, you can configure your new Point of Interest (POI) by selecting its style and the content it will display:
- Style: Choose how the POI will look inside the room. Your options include:
- Icon: A standard visual marker.
- Callout Text: A visible text label highlighting a specific spot.
- Selection Area: A defined, clickable zone (useful for highlighting objects).
- Embedded Media: Choose to embed an Image, Text, HTML block, Slideshow, Video, Link, or 3D Object directly into the scene.
- Content: click the corresponding Content button to determine what happens when a user interacts with the POI. None: Select this option if you want the POI to act as a purely visual element that is not clickable.
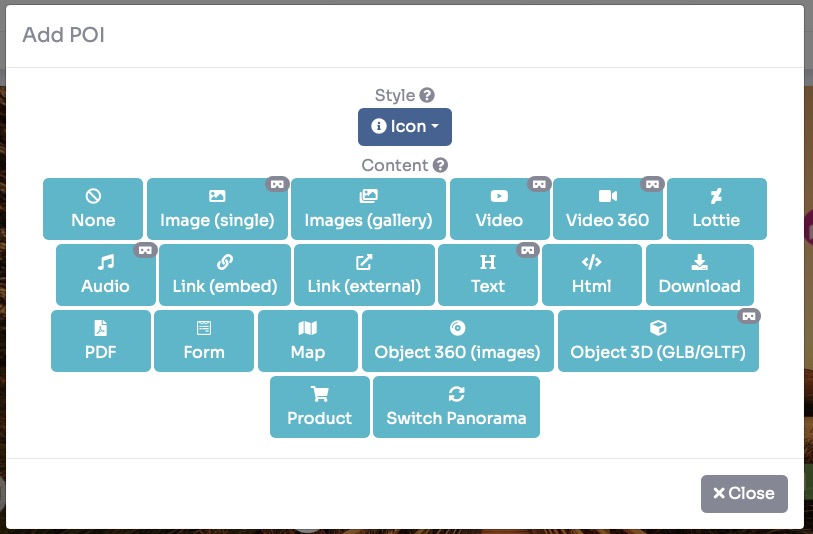
Click Save to place the POI in the room.
Once you've added your POI, you can easily modify it by clicking on it in the scene. A small menu will appear above the POI with the following options:
- Move: Reposition the POI to a new location within the room.
- Edit: Open the settings window to change the POI's style, content, or properties.
- Duplicate: Create an exact copy of the POI.
- Delete: Remove the POI from your tour.

When you click the Move icon, you can freely drag the POI to a new location within the room. While making these adjustments, you can also set the following properties:
- Perspective: Adjust the 3D angle so the POI aligns naturally with the room's geometry.
- Size: Change the overall dimensions of the POI.
- Visibility: Control whether the POI is shown or hidden.
- Z Order: Set the stacking order, which determines which element appears in front if multiple objects overlap.
- Scale: Fine-tune the visual proportions of the POI.
- Sticky: Keep the POI pinned to the edge of the screen when it moves out of the user's direct field of view, so they always know where it is.
- Bulk move all: Apply your current movement and adjustments to all other POIs in the room simultaneously.

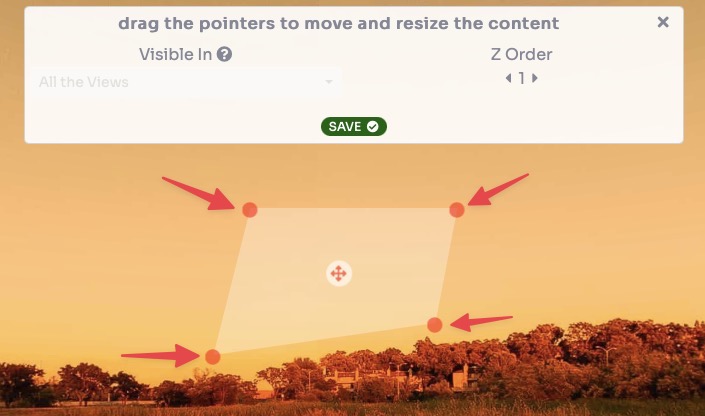
If you chose Selection Area or any of the Embedded media options as your POI style, you can customize the shape and size of the interactive area by click and drag the four corner pointers to stretch, shrink, or shape the POI area exactly how you need it to fit within the room.
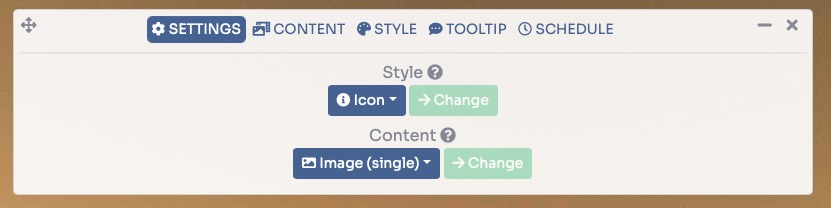
Clicking the Edit icon opens a pop-up window organized into five tabs, allowing you to thoroughly customize your POI:
- Settings: Change the overall POI style or switch to a different content type.
- Contents: Upload, edit, and format the specific content displayed by the POI.
- Style: Customize the visual design of the POI icon or manage your embedded media.
- Tooltip: Add descriptive text that will appear when a user hovers their cursor over the POI.
- Schedule: Set specific days and times when the POI should be visible within the tour.


After made the changes click Save.