How to create a Globe view?

Andrea
Last Update hace 2 meses
Globe View provides a unique perspective where the virtual tour is displayed on 3D globe. It allows users to navigate and explore different locations as if they were traveling around the world. This feature can be particularly useful for showcasing virtual tours with geographically diverse content or highlighting multiple locations.
Select Publish - Globes, from the side menu.
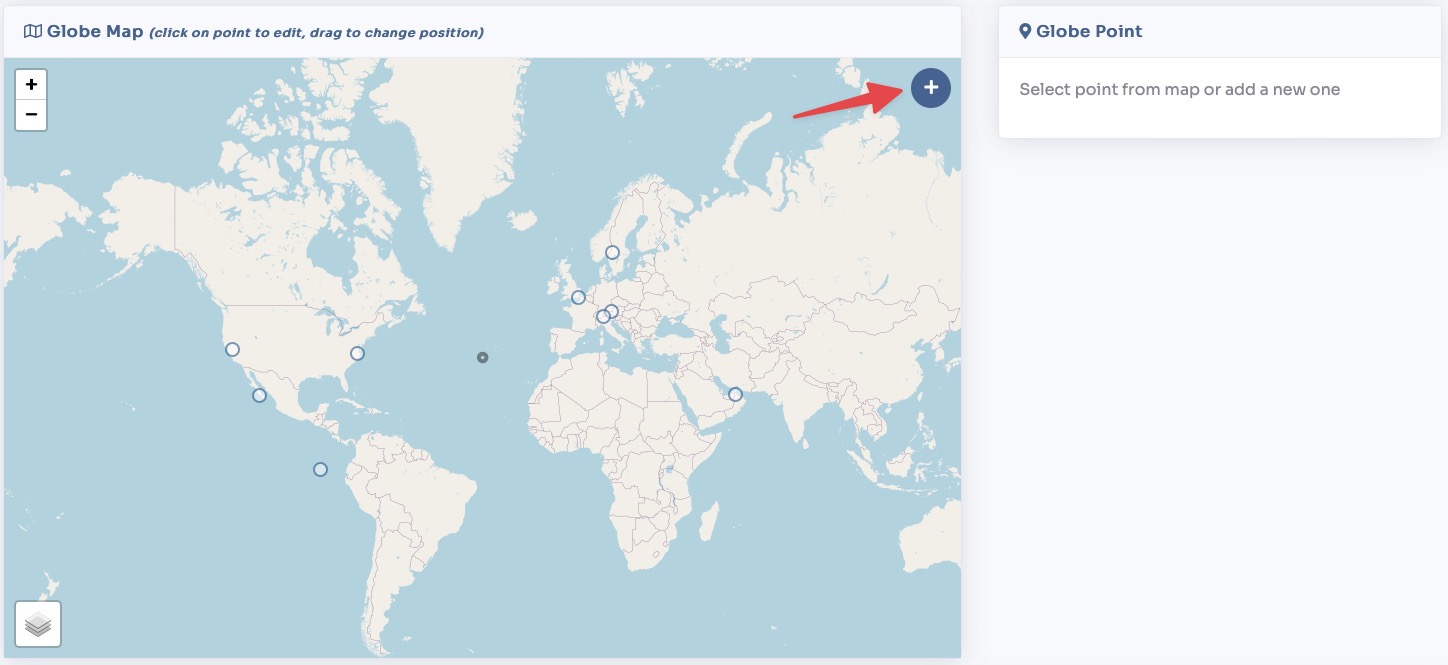
Click the + icon located in the top right corner of the screen.
In the window that appears, enter a title into the Name field.
Select whether you want to display Tours or Rooms within this mode.
Click the + Create button to confirm.


After creating your new globe, you will be automatically redirected to the settings page. Here, you can configure the map's behavior, appearance, and starting position:
- Name: Enter a custom title for your globe.
- Type: Select the map rendering style (e.g., the standard Default view or Google's Photorealistic 3D Tiles).
- Open Target: Choose how the virtual tour opens when a user clicks a point (e.g., in the same window or a new tab).
- Default View: Choose whether the map initially loads with a Satellite or Road layout.
- Zoom Duration (s): Set the length of the zoom animation (in seconds) when a user clicks on a tour placement point.
- Minimum Altitude: Set a hard limit on how close the camera is allowed to zoom in to the map.
- Point Size (px): Adjust the visual size (in pixels) of the tour placement markers on the map.
- Point Color: Customize the main fill color of your tour positioning points.
- Point Border: Customize the outer border color of your positioning points.
- Google Analytics Tracking ID: Input your GA tracking code to monitor visitor traffic and interactions on your globe.
- Enable Cookie Consent: Check this box to display a standard cookie consent banner for privacy compliance.
- Enable PWA: Check this box to enable Progressive Web App functionality, allowing users to install the globe experience directly on their devices.
- Logo: Upload a custom image or company logo to display in the upper-left corner of the globe.
- Initial Position: Click the Set button to define the exact starting coordinates (Center Latitude / Longitude) and the Initial Altitude when the globe first loads. Tip: If you remove this or leave it blank, the map will automatically center itself to fit all of your placed tours on the screen.

To assign virtual tours to a Globe Map click on "+" icon.
A modal will open where you can select the tour. To add it click on the "+ Create" button.

Once a point is placed on the map, you can easily adjust its exact location using either of the following methods:
- Drag and Drop: Click and hold the point to visually drag it to a new position on the map.
- Manual Entry: Type the exact numerical coordinates directly into the Latitude and Longitude fields for absolute precision.
- Approach Position: Define the exact coordinates and camera angle the viewer will transition to when clicking on a map point.

Scrolling further down the page you will find sections to change the globe's meta tags and publish link / embed code.
You can view a live preview of globe here